

Best Mindmap Apps for Students: Unleash Your Academic Potential with Visual Learning Tools
Discover the best mindmap apps for students to streamline study sessions, visualize ideas, and achieve academic excellence.

Education Consultant
Anna Xue · 9/8/2024 · 7 min read ![[Brainstorming with Mindmaps]: Unleash Your Creative Potential – Step-by-Step Guide](/_astro/Brainstorming with Mindmaps Unleash Your Creative Potential Step by Step Guide.DFJgWNVI_Z1c3biw.webp)
In the world of creativity and problem-solving, brainstorming is a fundamental activity. It allows individuals and teams to generate new ideas, solve complex problems, and innovate in various fields. However, traditional brainstorming sessions can sometimes become chaotic and unproductive. This is where mindmaps come into play. Mindmapping is a powerful technique that can transform your brainstorming sessions into organized, effective, and incredibly creative endeavors. In this step-by-step guide, we’ll explore the amazing benefits of mindmapping and provide you with actionable steps to harness its full potential.
Image from: Canva
Mindmapping is a visual tool that helps structure information, making it easier to analyze, comprehend, and recall. It involves creating a diagram where a central idea is placed in the middle, and related ideas branch out from it in a radial pattern. This structure mimics the way our brains naturally work, making it an effective method for organizing thoughts and ideas.
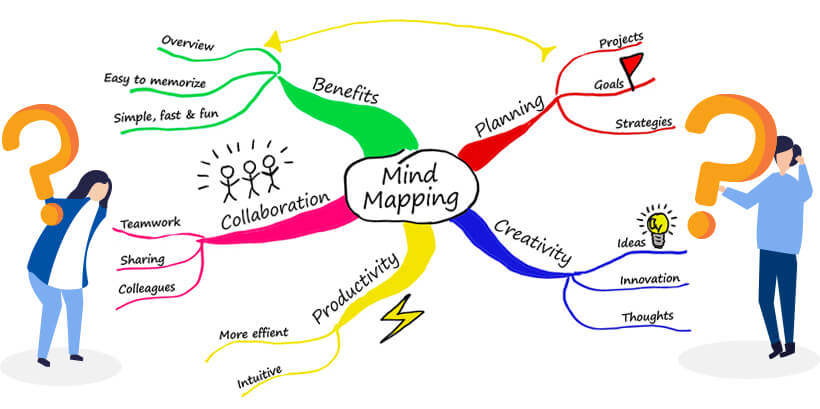
Image from: MindMapping.com
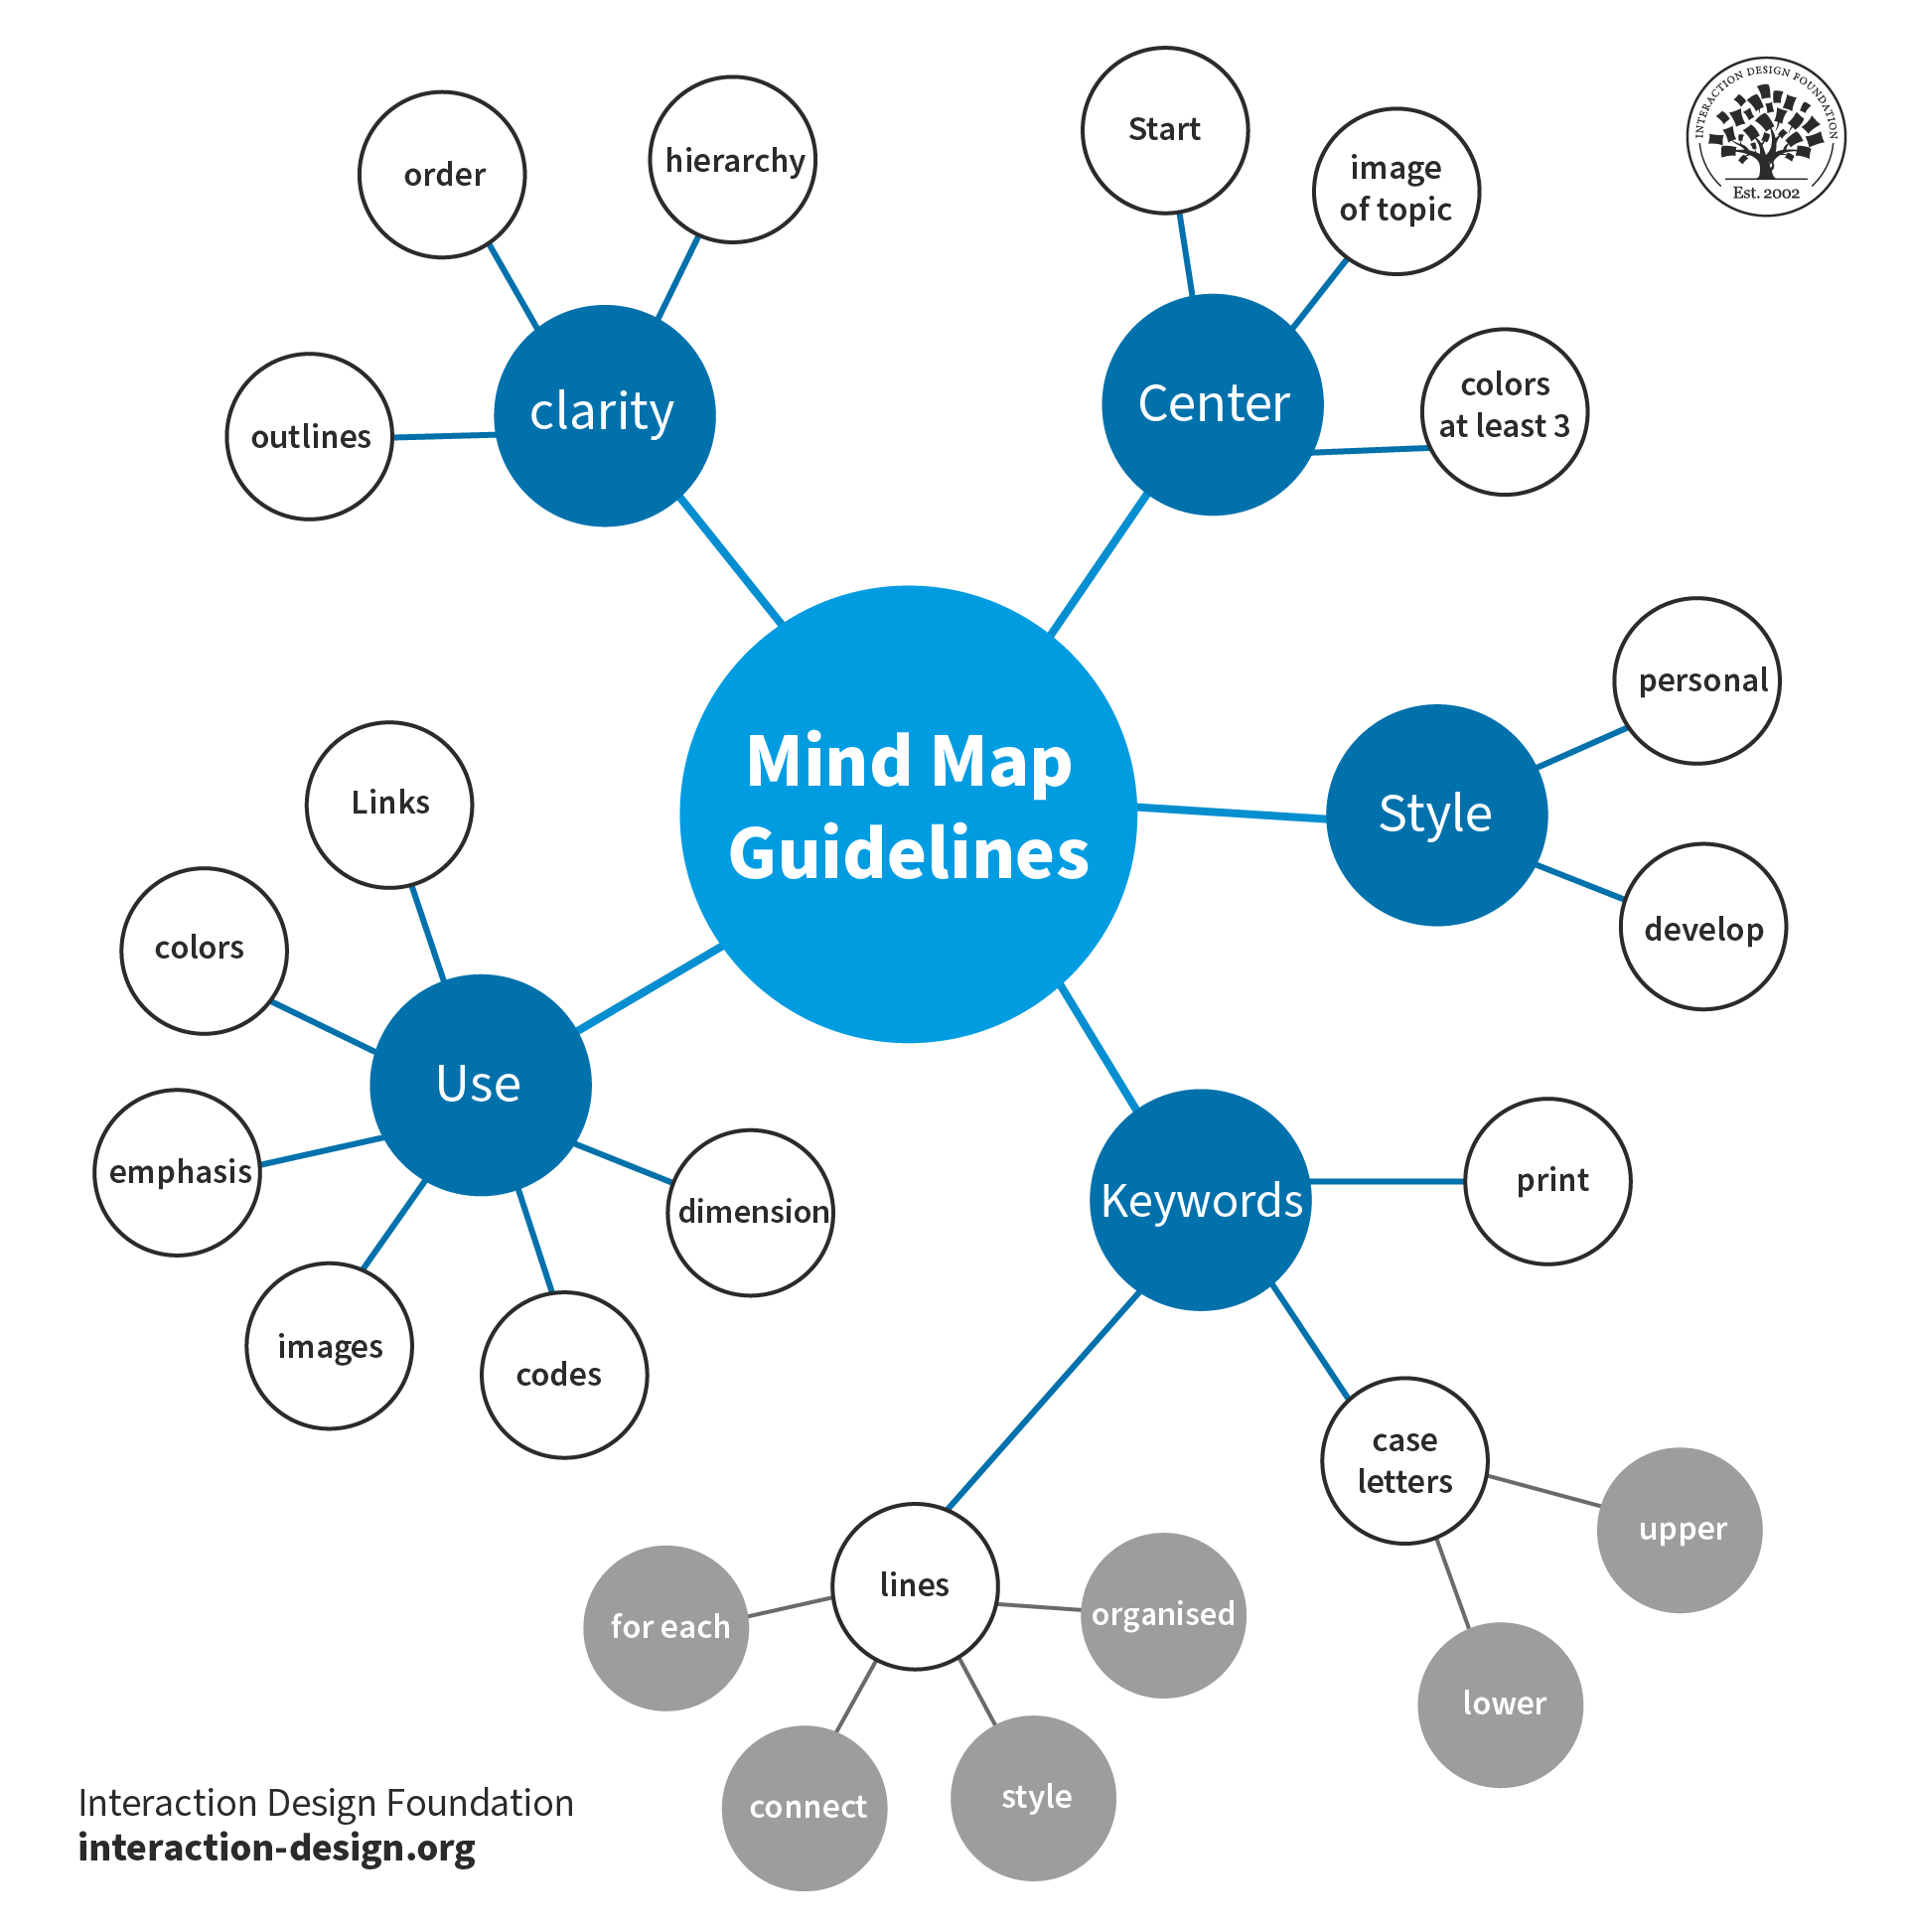
Image from: INTERACTION DESIGN FOUNDATION
Start by identifying the central theme or problem you want to address. Write this idea in the center of your page or digital mindmapping tool. This central idea will be the foundation of your mindmap. It’s essential to keep this central idea clear and concise to provide a strong starting point for your brainstorming.
From the central idea, draw several main branches that represent the key categories or components of your theme. These main branches should cover the primary aspects you want to explore. For example, if your central idea is “Launching a New Product,” your main branches could be:
For each main branch, add sub-branches to delve deeper into specific details and subtopics. These sub-branches should break down the main categories into more specific ideas or tasks. For instance:
Under Market Research:
Target Audience: Define your potential customers.
Competitor Analysis: Study competitors’ strengths and weaknesses.
Survey Methods: Choose techniques for gathering data.
Under Product Design:
Features: List the key features of the product.
Prototyping: Outline the steps for creating a prototype.
User Testing: Plan how to test the product with real users.
To make your mindmap more engaging and memorable, use keywords and images. Keywords should be concise and capture the essence of the idea. Images and icons can be added to make the mindmap visually appealing and to reinforce memory retention. For example, a lightbulb icon can represent an idea or innovation, while a graph icon can signify data analysis.
One of the strengths of mindmapping is its ability to show connections between ideas. Use lines or arrows to connect related ideas across different branches. This helps in understanding how different aspects of your brainstorming session are interlinked. For example, you might connect “Target Audience” from Market Research to “User Testing” in Product Design to highlight the importance of user feedback in both areas.
Once you have your mindmap laid out, review it to ensure all relevant ideas are included and organized effectively. Refine the map by rearranging branches, adding new sub-branches, or removing redundant ideas. This step is crucial to ensure your mindmap is comprehensive and well-structured. Check for any gaps in your logic, and make sure the flow of ideas is clear and logical.
After refining your mindmap, seek feedback from peers or stakeholders. They might offer new perspectives or point out areas you missed. Incorporate this feedback to enhance your mindmap further.
Use your mindmap as a roadmap for implementation. As you work through your project, keep the mindmap updated with progress notes and any new insights. This will help you stay organized and ensure that all aspects of your brainstorming are addressed.
After completing your project, reflect on the effectiveness of your mindmapping process. Identify what worked well and what could be improved. Use these insights to iterate on your mindmapping approach for future projects.

There are several amazing tools available for creating mindmaps, both digital and analog. Here are some of the best ones:
Mindmapping can be used in various scenarios to enhance creativity and productivity. Here are a few practical applications:
To make the most out of your mindmapping sessions, consider these tips:
Image from: Canva
Mindmapping is an amazing tool that can revolutionize the way you brainstorm and organize your ideas. By following this step-by-step guide, you can unlock your creative potential and enhance your problem-solving skills. Whether you’re working on a personal project, collaborating with a team, or tackling a complex problem, mindmapping can provide the structure and clarity needed to succeed. Embrace the power of mindmaps and transform your brainstorming sessions into productive and creative experiences.
Discover the best mindmap apps for students to streamline study sessions, visualize ideas, and achieve academic excellence.
Education Consultant

Tree mind map, as a central theme as the core, radiate outward branching, helping us in the learning journey to ride the waves.
Education Consultant
Discover seven powerful tips to unlock your creative potential using mind maps, enhancing your ability to generate amazing ideas.
Education Consultant