Hierarchical maps are powerful tools for organizing information in a structured and visually appealing way. They are widely used in various fields, including education, business, and project management, to break down complex topics into more manageable components. By understanding how to effectively structure a hierarchical map, you can enhance clarity, improve information retention, and facilitate better communication.
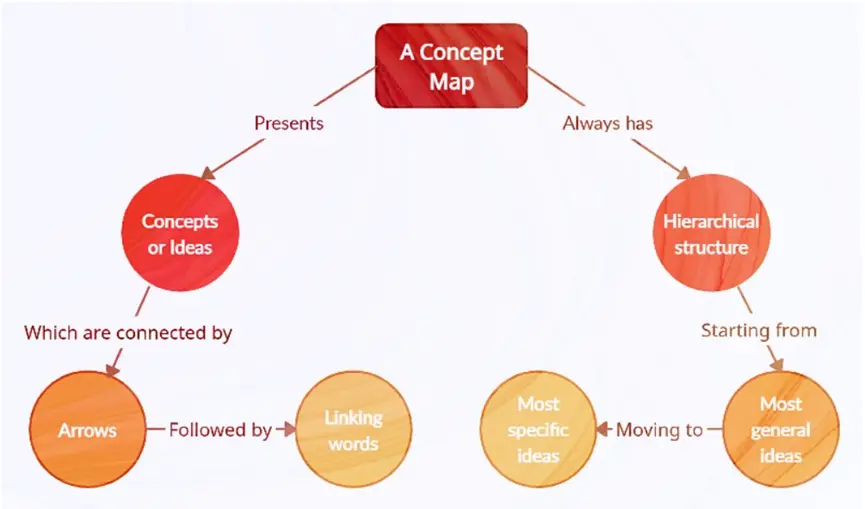
image from: Writers.net
Understanding Hierarchical Maps
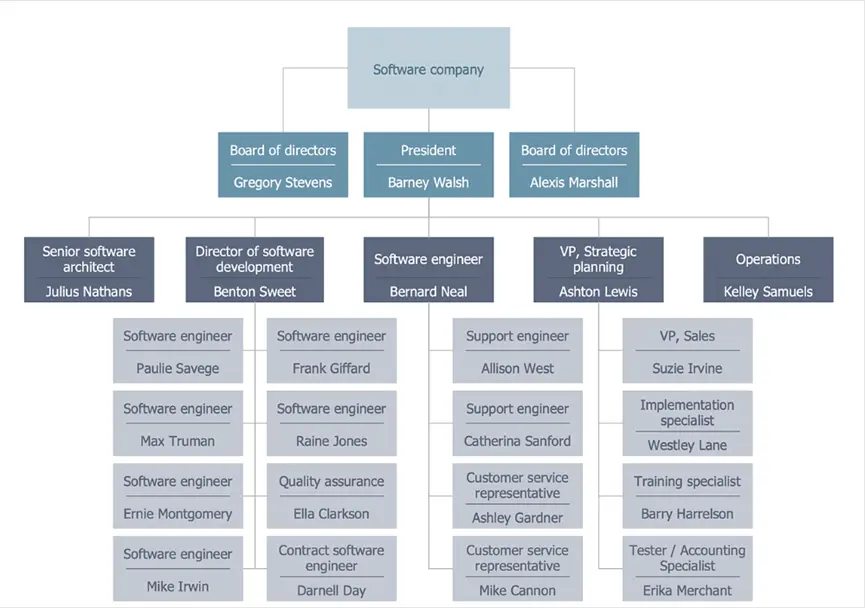
A hierarchical map, also known as a tree diagram or hierarchical diagram, represents information in a top-down structure. The most general or overarching concept is placed at the top, with more specific subtopics branching out below. This structure allows for a clear visualization of relationships between different levels of information.
For example, in a business setting, a hierarchical map could be used to outline a company’s organizational structure, with the CEO at the top, followed by department heads, team leaders, and individual employees. In education, it might be used to break down a subject into its main topics, subtopics, and individual concepts.
Step 1: Define the Central Concept
The first and most crucial step in creating a hierarchical map is defining the central concept. This concept serves as the foundation of your map, acting as the starting point from which all other elements will branch out. The central concept should encapsulate the primary idea or theme you wish to explore, ensuring that it is broad enough to encompass the various subtopics while still maintaining a clear and focused scope.
For instance, if you are mapping out a project management plan, your central concept might be “Project Lifecycle.” This concept should provide a comprehensive view of all phases involved in the project, such as initiation, planning, execution, monitoring, and closure. By selecting a central concept that is both encompassing and specific, you ensure that your hierarchical map will be organized, coherent, and purposeful.
Defining the central concept also sets the tone for the entire mapping process. It dictates how detailed your subtopics need to be and helps in determining the appropriate structure for your map. A well-chosen central concept not only guides the development of your hierarchical map but also aids in communicating the overall message or purpose of the map to others, making it an essential starting point in the mapping process.
Step 2: Identify Key Subtopics
Once you have defined the central concept, the next step is to identify the key subtopics that will form the first level of your hierarchical map. These subtopics should be directly related to the central concept and represent the main categories or components.
Continuing with the marketing plan example, the key subtopics might include “Market Research,” “Target Audience,” “Marketing Channels,” and “Budget.” These subtopics will be the first branches extending from your central concept.
Step 3: Break Down Subtopics into Smaller Units
After identifying the key subtopics, it’s time to break them down into smaller, more specific units. This process involves identifying the subcategories or elements within each subtopic.
For example, under the “Marketing Channels” subtopic, you might have further branches for “Social Media,” “Email Marketing,” “Content Marketing,” and “Paid Advertising.” Each of these elements can then be broken down into even more specific units, such as individual social media platforms or types of content.
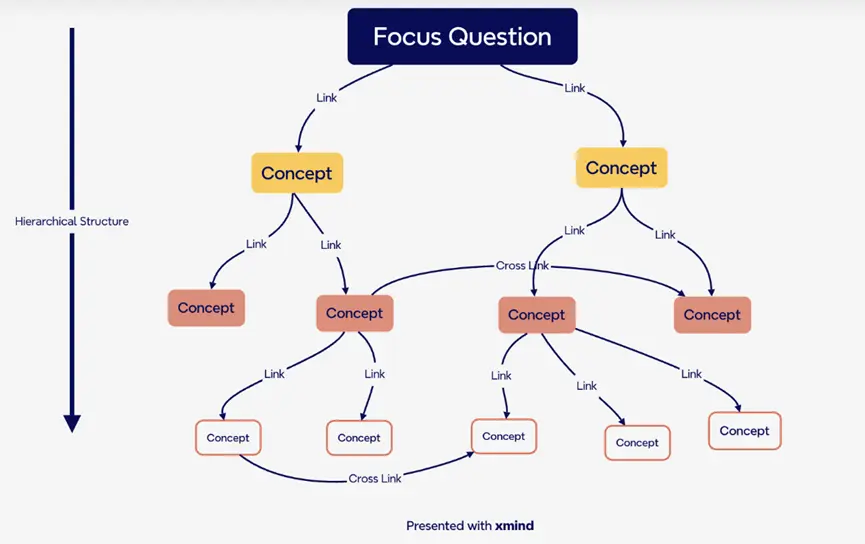
image from: Xmind
A well-structured hierarchical map requires careful organization to ensure that information flows logically from one level to the next. The relationships between different elements should be clear, with higher levels representing broader concepts and lower levels representing more detailed information.
To achieve this, consider the following:
Grouping: Group related elements together to create a cohesive structure.
Sequencing: Arrange information in a logical sequence, such as chronological order or priority level.
Consistency: Maintain consistent levels of detail across the map to avoid overwhelming certain branches with too much information.
Step 5: Use Visual Cues for Clarity
Visual cues play a crucial role in enhancing the clarity and readability of a hierarchical map. These cues can include shapes, colors, lines, and icons that help differentiate between different levels of information and highlight important connections.
Shapes: Use different shapes to represent different levels of information. For example, circles for the central concept, rectangles for subtopics, and diamonds for specific elements.
Colors: Assign colors to different levels or categories to visually distinguish them. This can make it easier to follow the map’s structure and identify key areas.
Lines: Use lines to connect related elements and show the flow of information from one level to the next. Consider using thicker lines for major branches and thinner lines for minor ones.
Icons: Incorporate icons or symbols to represent specific concepts or actions. For example, a lightbulb icon might indicate a new idea, while a dollar sign could represent budget-related items.
Step 6: Review and Revise
Once your hierarchical map is complete, it’s important to review and revise it to ensure accuracy and clarity. Check for any gaps or inconsistencies in the information, and make sure that the map accurately represents the relationships between different elements.
Consider the following during your review:
Completeness: Have you included all relevant subtopics and elements?
Accuracy: Is the information correct and up to date?
Clarity: Is the map easy to understand, with a clear flow of information?
Visual Appeal: Does the map use visual cues effectively to enhance readability? If necessary, make revisions to improve the structure and presentation of your hierarchical map. This might involve reorganizing certain elements, adding or removing branches, or adjusting visual cues.
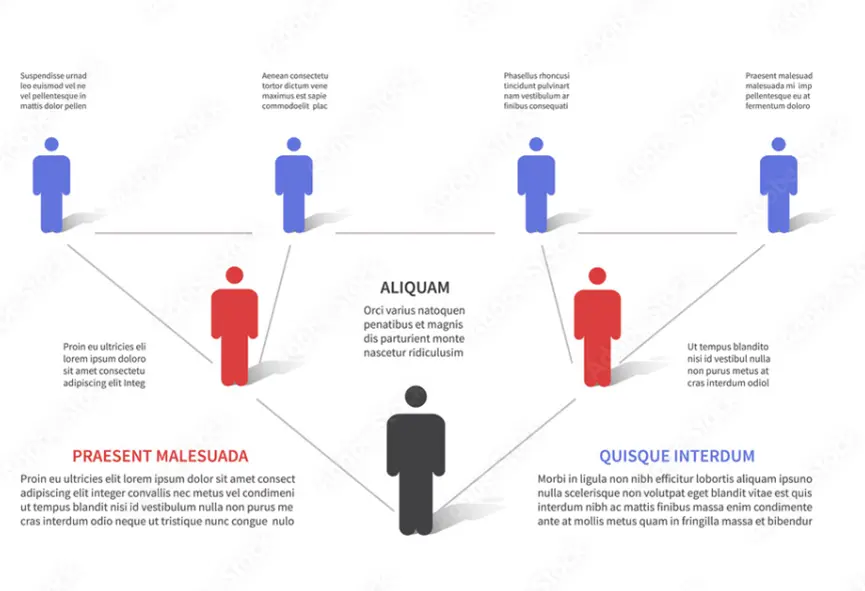
image from: Adobe Stock
Conclusion
Structuring a hierarchical map requires careful planning and attention to detail. By following these steps, you can create a map that effectively organizes information, enhances understanding, and facilitates better communication. Whether you’re using a hierarchical map for business, education, or personal projects, a well-structured map can help you break down complex topics and visualize relationships between different levels of information.
Remember that the key to a successful hierarchical map is clarity. By defining your central concept, organizing subtopics logically, and using visual cues, you can create a map that is both informative and easy to navigate. With practice, you’ll be able to use hierarchical maps to streamline your work, improve collaboration, and achieve your goals more efficiently.