In today’s fast-paced educational and professional environments, effective note-taking is essential for retaining information and enhancing comprehension. Mind mapping is a powerful visual technique that transforms traditional note-taking into a more dynamic and engaging process. This article explores the concept of mind mapping in the context of note-taking, highlighting its benefits and presenting various mind mapping methods. We will delve into the best techniques for creating mind maps, including library mind maps, brace mind maps, and flow chart maps. Each method will be accompanied by detailed steps, pros and cons, and practical applications. Furthermore, we will provide valuable tips to enhance your mind mapping experience, ensuring that you can leverage this technique to improve your learning and retention of information.
What’s Mind Mapping in Note-Taking?
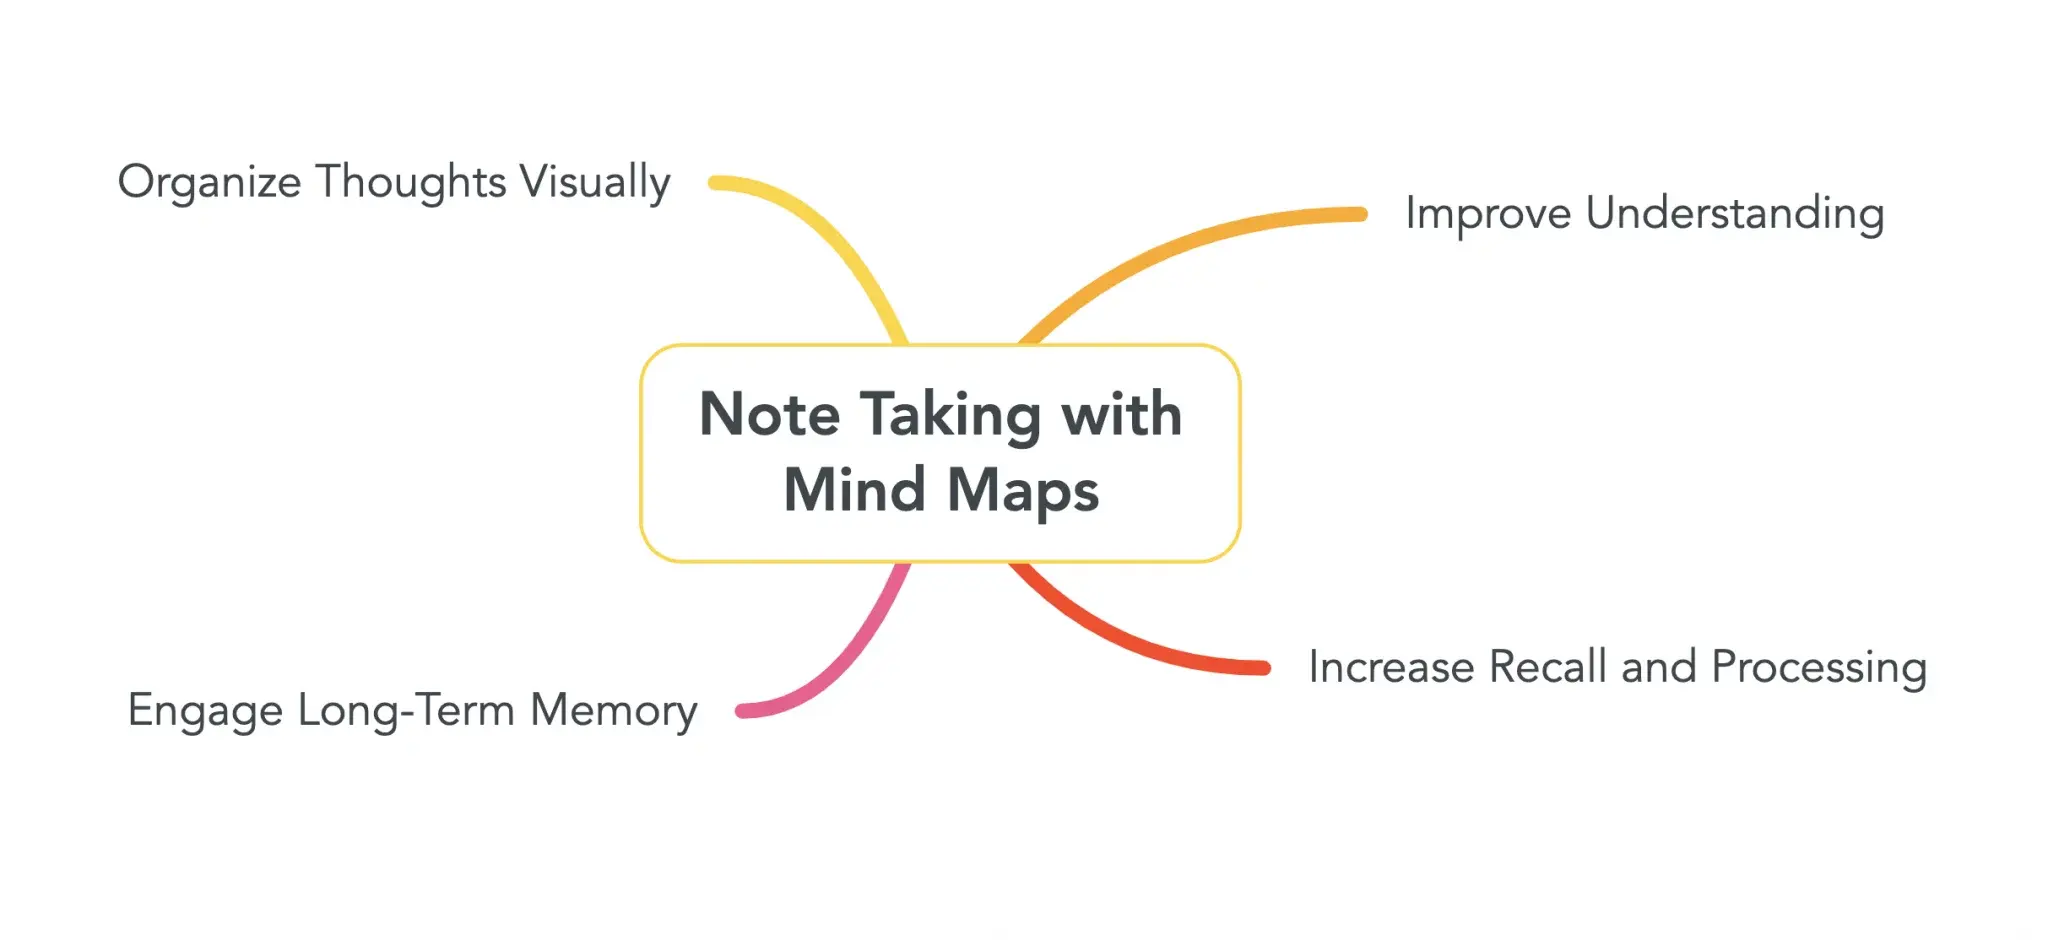
Mind mapping is a visual representation of information that helps individuals organize their thoughts and ideas in a structured manner. This technique involves creating a diagram that starts with a central concept, from which related subtopics branch out. The result is a network of interconnected ideas that illustrates the relationships between different pieces of information.
In the context of note-taking, mind mapping serves as an effective alternative to traditional linear notes. Instead of writing down information in a sequential format, mind mapping allows users to capture complex ideas visually, making it easier to understand and remember the material. The central idea is typically placed in the middle of the page, and as you branch out, you can include keywords, images, and symbols that represent specific details related to the main topic. This approach not only enhances memory retention but also fosters creative thinking and problem-solving by visually illustrating how concepts interrelate.
Benefits of Using Mind Map Methods for Note-Taking
Utilizing mind mapping methods for note-taking offers a multitude of advantages that can significantly enhance the learning experience and improve information retention:
- Improved Retention: Mind maps engage both the left and right hemispheres of the brain, combining logical thinking with creativity. This dual engagement helps reinforce memory retention, making it easier to recall information later. The visual nature of mind maps allows learners to create mental images that facilitate memory recall.
- Enhanced Understanding: By visually organizing information, mind maps help learners see the connections between ideas, leading to a deeper understanding of the material. This holistic view allows for better comprehension of complex topics, as learners can easily identify relationships and hierarchies among different concepts.
- Increased Engagement: The interactive nature of mind mapping keeps learners engaged and motivated. The process of creating a mind map can be more enjoyable than traditional note-taking methods, making it easier to stay focused during lectures or study sessions. This engagement can lead to a more active learning experience.
- Flexibility and Adaptability: Mind maps can be easily modified and expanded as new information is acquired. This adaptability allows learners to update their notes without disrupting the overall structure, making it a dynamic tool for ongoing learning. Users can add new branches or details as they encounter additional information.
- Facilitated Brainstorming: Mind maps are excellent for brainstorming sessions, as they allow users to generate and organize ideas quickly. This method encourages free thinking and creativity, leading to innovative solutions and insights. The visual format helps in capturing spontaneous ideas that may arise during discussions.
The Best 3 Mind Map Methods for Note-Taking
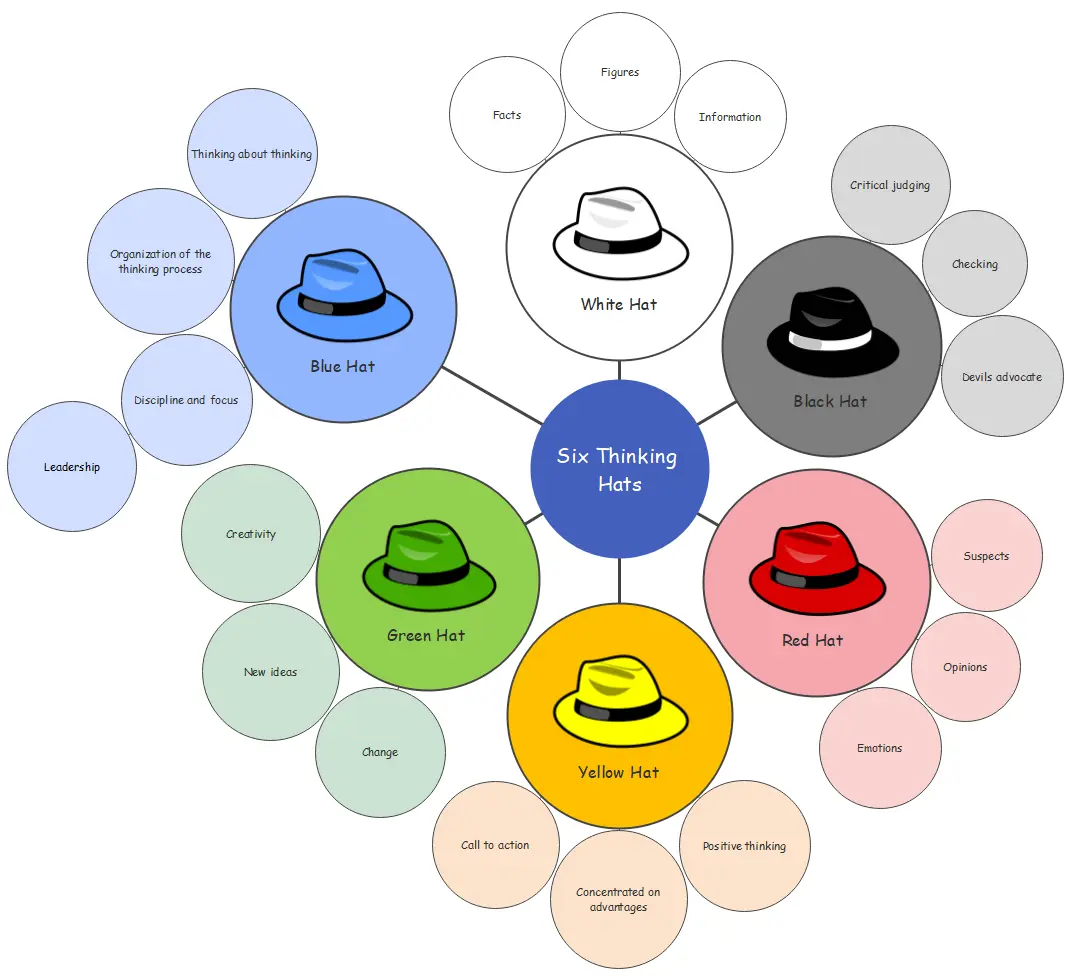
Method 1: Library Mind Maps

Image from: goodnotes.com
When to Use This Mind Mapping Method
Library mind maps are particularly effective for organizing and summarizing information gathered from lectures, books, or research articles. They are ideal for deep dives into specific subjects, making them useful for exam preparation, essay writing, or project planning. When faced with a wealth of information, library mind maps can help distill the most critical points and present them in a clear, visual format.
Library mind maps are especially beneficial when:
- Exploring a specific topic in-depth and understanding the relationships between various subtopics and supporting ideas.
- Summarizing key points from a lecture or textbook chapter to create a comprehensive study guide.
- Organizing research materials and sources for a literature review or research paper.
- Preparing for exams by visually connecting important concepts and theories.
- Brainstorming ideas for an essay or article and structuring the main arguments and supporting evidence.
By using a library mind map, you can effectively capture the essence of a subject, identify patterns and connections, and develop a deeper understanding of the material. This method is particularly useful when you need to synthesize large amounts of information into a coherent and memorable format.
How to Create Library Mind Maps (Step by Step)
- Identify Your Topic: Begin by writing the main topic or theme in the center of the page. This central node serves as the focal point for your mind map.
- List Major Key Points: Surround the central node with major key points or subtopics that relate to the main idea. These key points should represent the primary concepts you want to explore further.
- Branch Out Supporting Ideas: From each key point, draw branches that represent supporting ideas or details. Connect these branches with lines to indicate their relationships. This branching structure allows you to explore each subtopic in depth.
- Use Colors and Images: Enhance your mind map by incorporating colors and images to make it visually appealing and easier to remember. Different colors can represent different categories or themes, while images can serve as visual cues.
- Review and Revise: After completing the mind map, take a moment to review it for clarity and completeness. Make any necessary revisions to ensure it accurately represents the information you have gathered.
Pros and Cons
Pros:
- Provides a clear visual representation of information, making it easy to grasp complex topics.
- Helps in summarizing and synthesizing information effectively, allowing for quick review and recall.
- Encourages active engagement with the material, leading to a more immersive learning experience.
Cons:
- May require practice to master the technique, especially for those new to mind mapping.
- Can become cluttered if too many details are included, making it difficult to read.
Method 2: Brace Mind Maps
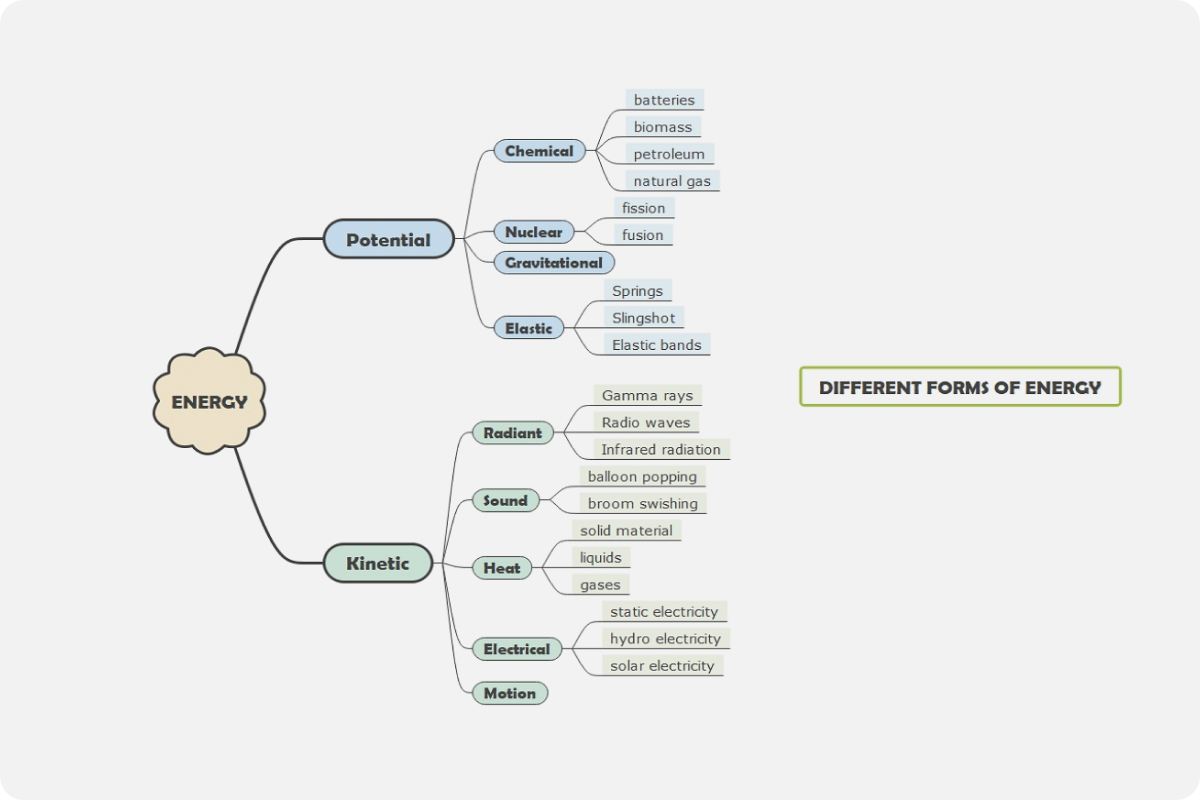
Image from: Brace Map Template | EdrawMind
When to Use This Mind Mapping Method
Brace mind maps are particularly useful for breaking down big ideas into smaller, manageable parts. They are effective for understanding part-to-whole relationships, such as analyzing characters in literature, components of a physical object, or the steps involved in a process. This method allows learners to categorize information systematically.
Brace mind maps are especially helpful when:
- Identifying and labeling the parts of a whole, such as the organs of the human body or the components of a car engine.
- Analyzing characters in a novel or play based on their relationships, motivations, and actions.
- Illustrating the hierarchy within an organization or the steps in a process.
- Categorizing information into clear, distinct groups for better understanding and recall.
By using a brace mind map, you can visually break down complex topics into their constituent parts, making it easier to grasp the relationships between them. This method is particularly useful when you need to analyze or categorize information in a systematic way.
How to Create Brace Mind Maps (Step by Step)
- List the Main Idea: Write the main idea or topic on the left side of the page. This serves as the anchor for your brace map.
- Draw a Curly Bracket: Create a curly bracket next to the main idea. This bracket will visually connect the main idea to its components.
- List Related Items: Vertically list all the parts or related items to the right of the bracket. Each item should represent a component of the main idea, allowing you to see how they connect.
- Extend as Needed: Continue to draw additional brackets and lists as necessary to capture all relevant details. This flexibility allows you to expand the map as you gather more information.
- Visualize Connections: Use lines or arrows to indicate relationships between different parts of the brace map. This helps clarify how each component relates to the main idea.
Pros and Cons
Pros:
- Simplifies complex information into clear categories, making it easier to understand.
- Facilitates understanding of hierarchical relationships, allowing learners to see how different ideas fit together.
Cons:
- May not be suitable for all types of information, particularly those that do not have clear hierarchical relationships.
- Can be less visually engaging than other methods, which may impact motivation.
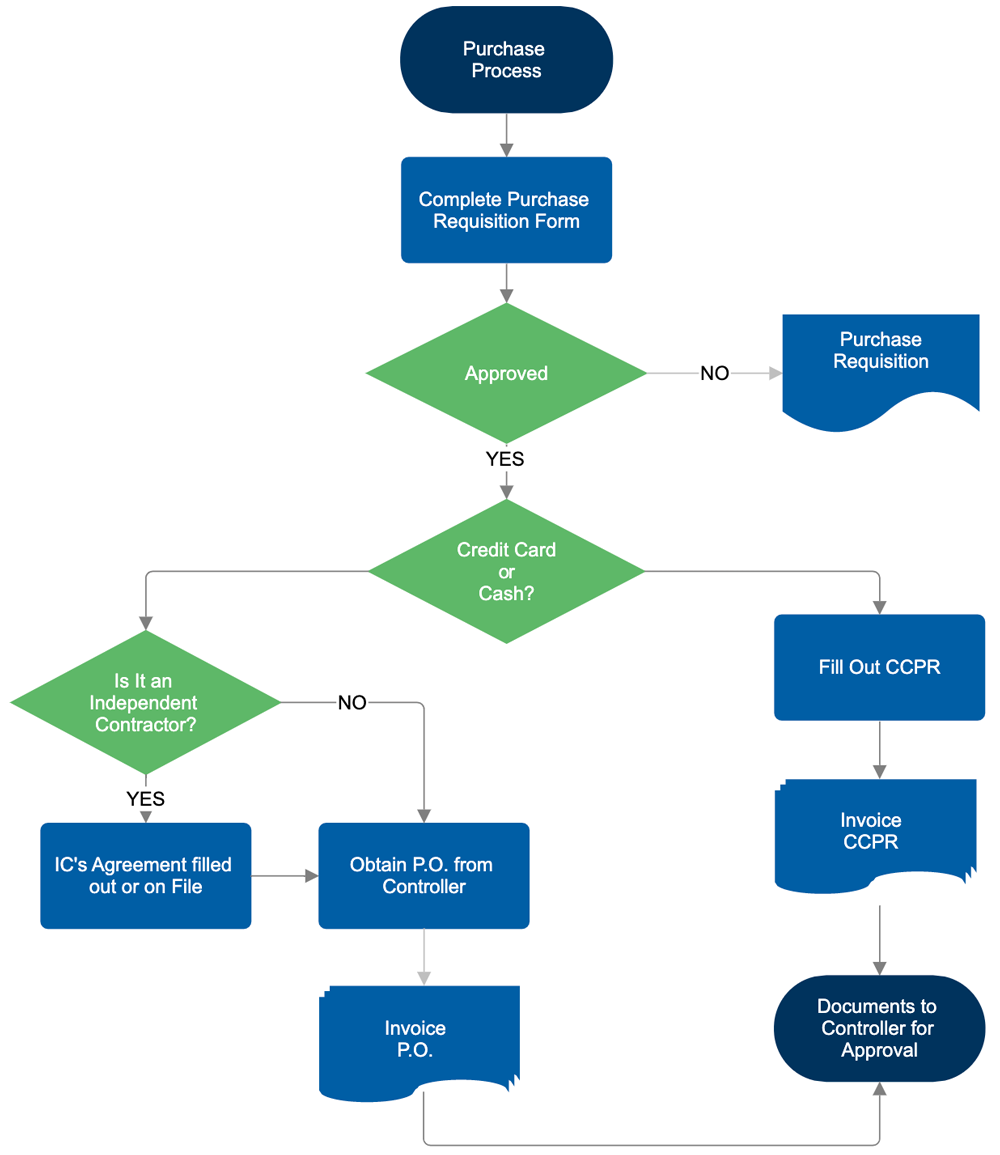
Image from: smartdraw.com
When to Use This Mind Mapping Method
Flow chart maps are best used for illustrating processes or sequences. They are ideal for visualizing workflows, decision trees, or any situation where a step-by-step approach is required. This method is particularly useful in fields such as business, engineering, and project management.
Flow chart maps are especially beneficial when:
- Explaining a step-by-step process, such as how to use a particular software or complete a task.
- Visualizing a decision-making process, such as troubleshooting a problem or choosing a course of action.
- Mapping out a workflow or project plan, breaking down the tasks and dependencies.
- Analyzing a sequence of events, such as the plot of a story or the stages of a life cycle.
By using a flow chart map, you can clearly illustrate the logical progression of a process, making it easier for others to understand and follow. This method is particularly useful when you need to convey a series of steps or decisions in a clear and organized manner.
How to Create Flow Chart Maps (Step by Step)
- Identify the Process: Determine the process you want to visualize and write the starting point at the top of the page. This serves as the entry point for your flow chart.
- Draw Shapes for Steps: Use shapes (e.g., rectangles for steps, diamonds for decisions) to represent each part of the process. Each shape should clearly indicate what the step entails.
- Connect with Arrows: Draw arrows between shapes to indicate the flow of the process. This directional flow helps users understand the sequence of steps.
- Label Each Step: Clearly label each shape with a brief description of the step or decision. This ensures that anyone reviewing the flow chart can easily follow the process.
- Review for Clarity: Ensure that the flow chart accurately represents the process and is easy to follow. Make any necessary adjustments to enhance clarity.
Pros and Cons
Pros:
- Provides a clear, linear representation of processes, making it easy to understand and follow.
- Useful for complex processes that require a step-by-step approach.
Cons:
- May oversimplify complex processes, leading to a loss of important details.
- Limited in capturing non-linear relationships, which may be necessary for some topics.
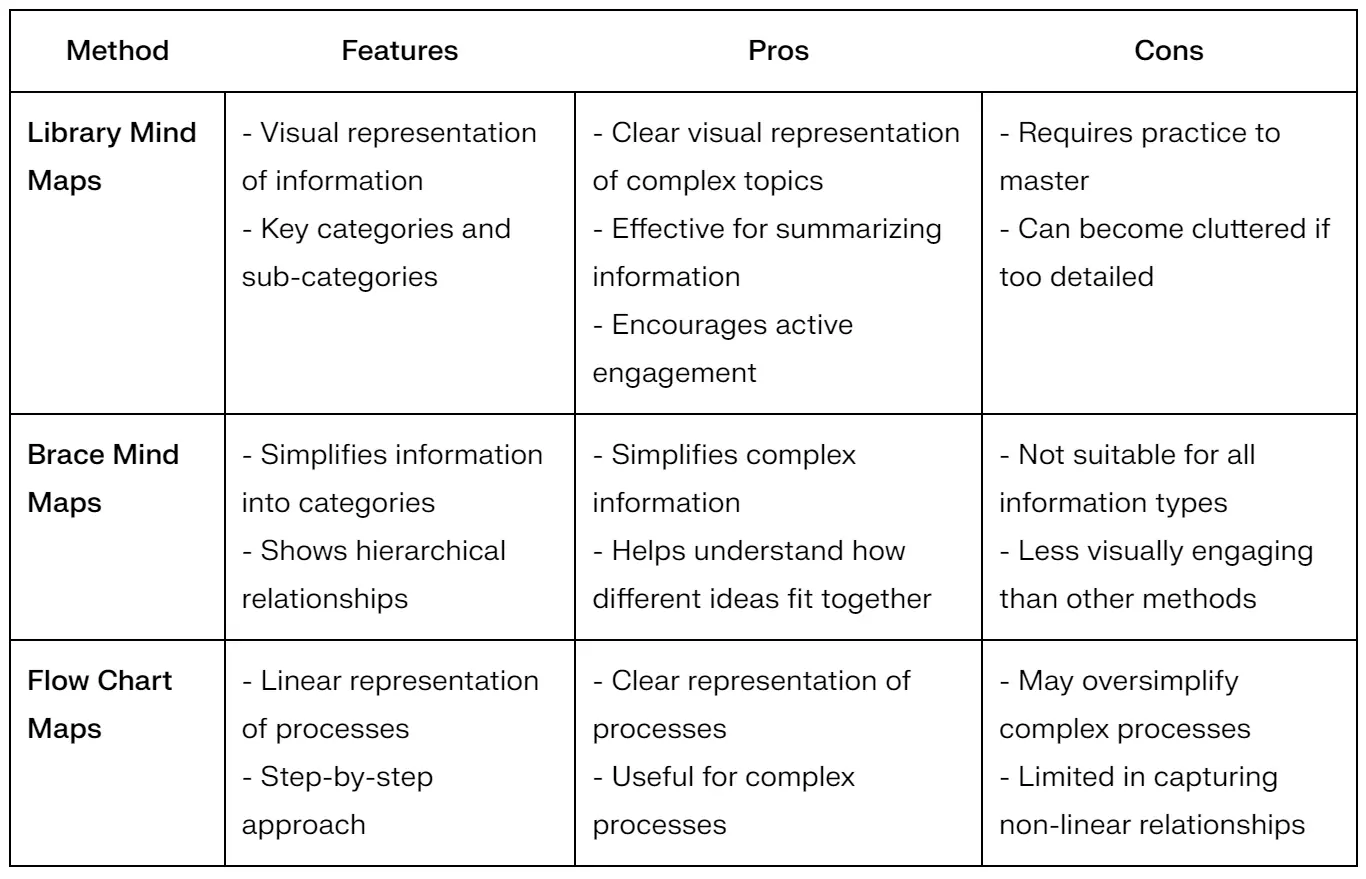
Comparison of Mind Maps Methods
Tips for Mind Mapping Methods for Note-Taking
- Keep It Simple: Use short phrases or keywords for each node to avoid clutter. This will help maintain clarity and ensure that the mind map is easy to read. Focus on capturing the essence of each idea rather than writing full sentences.
- Use Colors and Images: Incorporate colors and images to enhance visual appeal and aid memory retention. Different colors can represent different categories or themes, while images can serve as visual cues that make the information more memorable.
- Be Creative: Don’t hesitate to experiment with different layouts and designs. The more personal and engaging your mind map is, the more effective it will be. Consider using doodles, icons, or even stickers to make the map visually stimulating.
- Review Regularly: Periodically review your mind maps to reinforce learning and update them with new information. This will help solidify your understanding of the material and keep your notes relevant.
- Practice: Like any skill, effective mind mapping takes practice. The more you use mind maps for note-taking, the more proficient you will become. Try different methods and find what works best for your learning style.
Conclusion
Mind mapping is a powerful tool for note-taking that enhances understanding, retention, and engagement. By employing various mind mapping methods, learners can effectively organize and visualize complex information, making it easier to recall and apply later. Whether you choose library maps, brace maps, or flow chart maps, the key is to find the method that works best for your learning style and the material you are studying. With practice and creativity, mind mapping can transform your note-taking experience and significantly improve your academic performance.