
Tips for Clear and Engaging Timeline Maps
Discover tips for creating clear and engaging timeline maps to effectively organize and visualize project milestones, deadlines, and event schedules.

Education Consultant
Anna Xue · 8/5/2024 · 6 min read 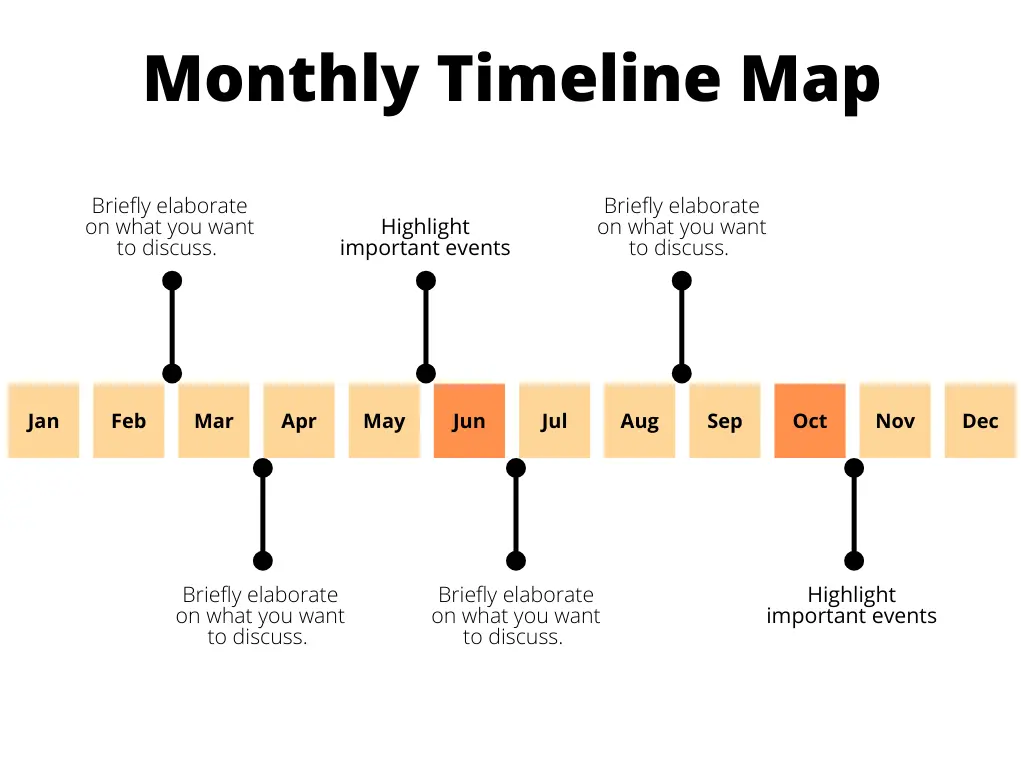
Creating a timeline map is an effective way to visualize the progression of events, projects, or historical sequences. A well-designed timeline map not only presents information clearly but also engages the viewer, making it easier to understand and retain the information. In this blog, we will explore what timeline maps are and provide some detailed tips on how to create clear and engaging timeline maps.
A timeline map is a visual representation that organizes events or milestones in chronological order along a linear scale. It allows viewers to see the sequence of events, the duration between them, and the overall progression over time. Timeline maps can be used for a variety of purposes, including project planning, historical education, personal goal tracking, and more.
Timeline maps can vary in complexity, from simple linear representations to more intricate designs that include branching paths or multiple layers of information. Regardless of the format, the primary goal of a timeline map is to provide a clear and coherent visual narrative of time-based data.
1. Chronological Order: Events are arranged in the order they occurred, making it easy to follow the sequence of events.
2. Time Intervals: The timeline is divided into consistent intervals (days, months, years) to help visualize the duration between events.
3. Event Descriptions: Each event is accompanied by a brief description, providing context and details about the event.
4. Visual Elements: Colors, icons, and images can be used to enhance the map’s visual appeal and aid in understanding.
5. Scalability: Timeline maps can be scaled to include different levels of detail, from high-level overviews to detailed breakdowns of events.
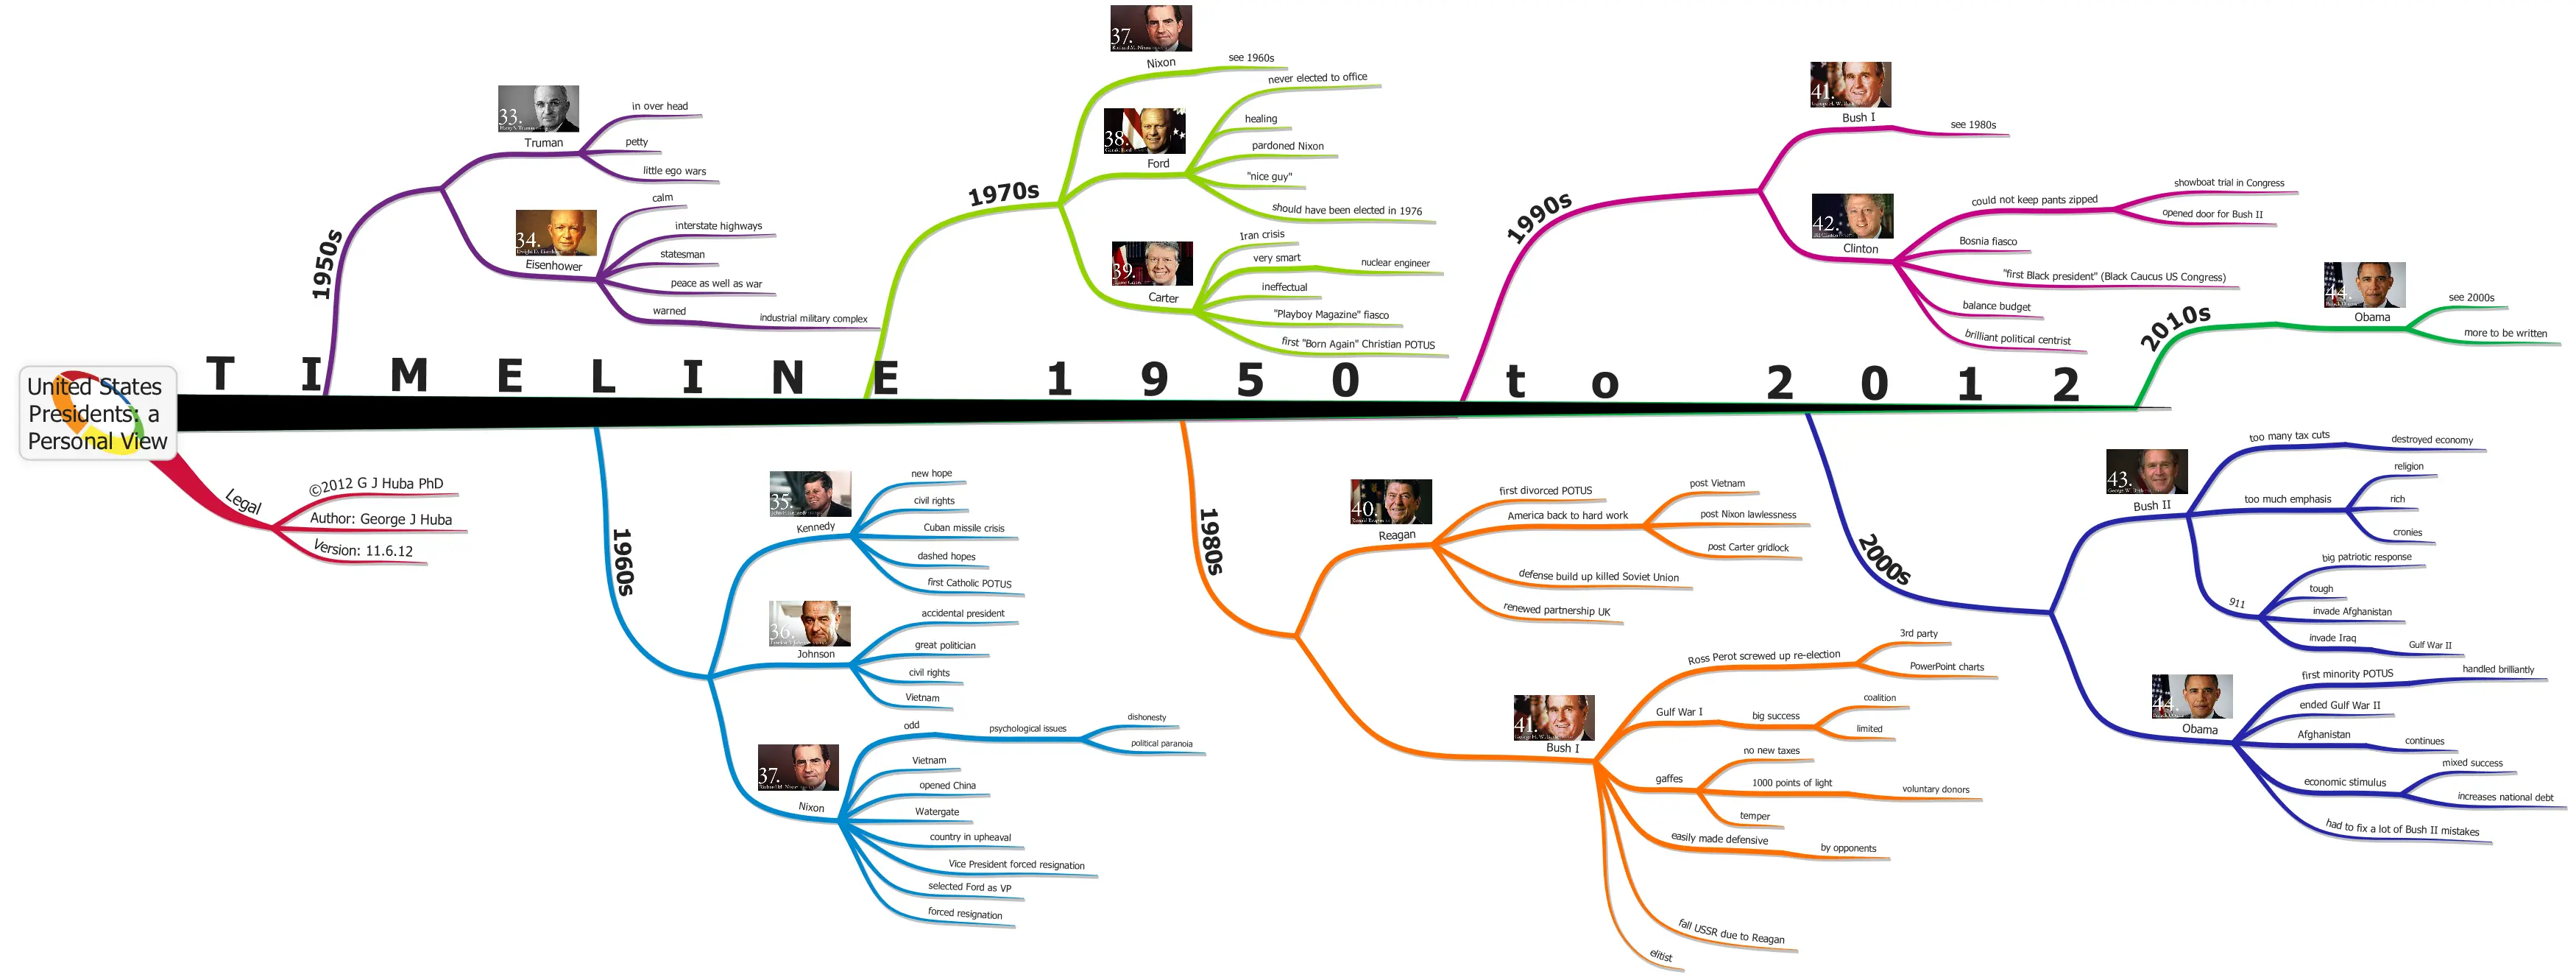
(A timeline map of a personal view about United States presidents)
Creating an effective timeline map involves several steps, from defining the purpose to refining the final design. Here’s a comprehensive guide to help you create a timeline map that is both clear and engaging.
The first step in creating a timeline map is to define its purpose and scope. Ask yourself what you want to achieve with the timeline and who the intended audience is. This will help you determine the level of detail needed and the time frame to cover.
For example, a timeline map for a project might focus on key milestones and deadlines, while a historical timeline might include significant events over several centuries. Clearly defining the purpose and scope will provide a solid foundation for the rest of the process.
Once you have defined the purpose and scope, gather all the relevant information that needs to be included in the timeline. This might involve researching historical events, collecting project milestones, or outlining personal goals. Organize the information chronologically to ensure a logical flow.
Create a list of events and their corresponding dates, and include any additional details or descriptions that will help provide context. This organized information will form the backbone of your timeline map.
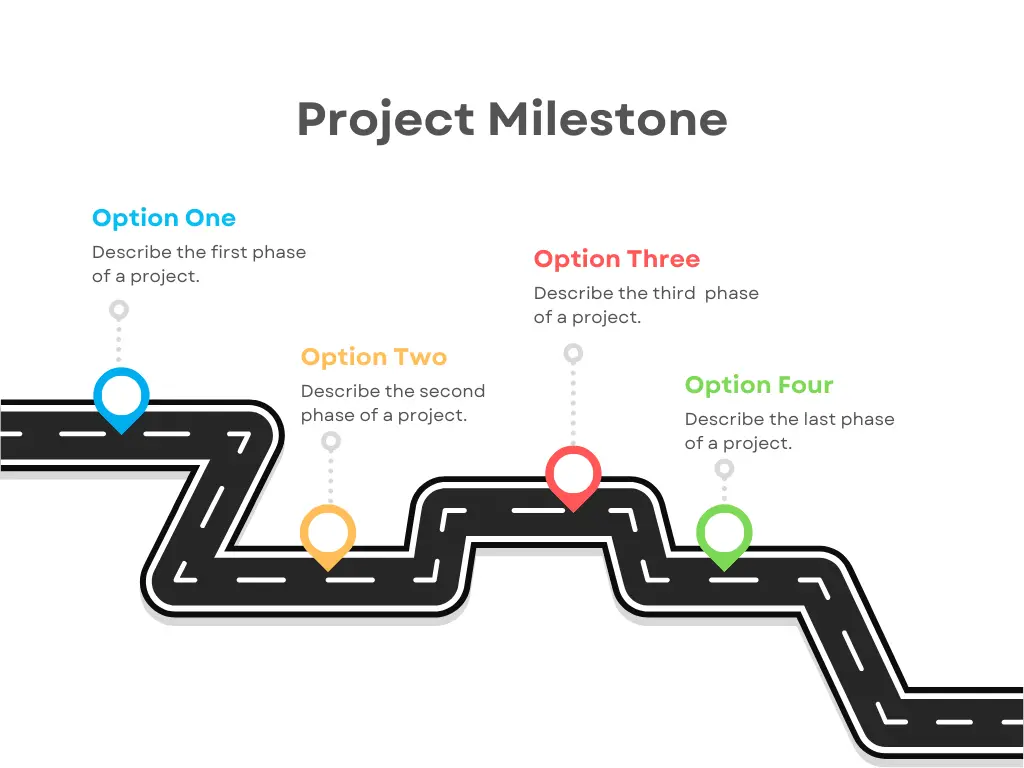
With your information in hand, decide on the structure of your timeline map. Consider whether a linear, vertical, or horizontal layout will work best for your data. Identify the key points or events that need to be highlighted and determine how they will be represented on the timeline.
Key points should be easily distinguishable and should stand out from less significant events. Use visual cues such as larger icons, bold text, or different colors to highlight these important moments.
l Choose the Right Tool
Choosing the right tool is crucial for creating an effective timeline map. There are several tools available, each with its own features and benefits:
Microsoft PowerPoint/Excel: These tools offer basic templates for creating timeline maps and are suitable for simple designs.
Canva: Canva provides a wide range of customizable templates and design tools, making it easy to create visually appealing timelines.
Venngage: Venngage offers user-friendly design options and templates, ideal for beginners.
Lucidchart: Lucidchart is great for creating detailed and professional timelines, with advanced features for complex designs.
Office Timeline: Specifically designed for creating timelines and Gantt charts, Office Timeline provides professional templates and advanced features for project management.
Each tool has its strengths, so choose one that aligns with your needs and design preferences.
Designing your timeline is where creativity comes into play. Here are some design principles to keep in mind:
Simplicity: Avoid overcrowding your timeline map with too much information. Focus on the most important events and use concise descriptions.
Consistency: Use consistent design elements (colors, fonts, sizes) to make the timeline easy to follow.
Balance: Arrange elements in a balanced way to create a visually appealing and readable timeline.
Contrast: Use contrast to highlight important events or differences between types of information.
Incorporate colors, icons, and images to enhance the visual appeal of your timeline. Ensure that the design is clean and that the information is easy to understand at a glance.
To make your timeline map more engaging, consider adding interactive elements. If you’re using digital tools, you can include clickable links, pop-up descriptions, or even animations to reveal events progressively. This can help keep viewers engaged and make the timeline more dynamic.
Additionally, think about adding a narrative element to guide viewers through the timeline. A brief introduction or summary at the beginning can provide context and set the stage for the events that follow.
Once you have designed your timeline, review it carefully to ensure accuracy and completeness. Check for any errors or omissions and make necessary adjustments. Seek feedback from others to gain different perspectives and identify any areas that need improvement.
Refining the timeline involves polishing the design, ensuring visual clarity, and making sure the timeline effectively communicates the intended message. Don’t be afraid to make revisions and iterate on the design until you achieve the desired outcome.
Creating a clear and engaging timeline map involves careful planning, organizing information, choosing the right tools, and applying effective design principles. By following these steps, you can create a timeline map that not only presents information clearly but also engages and informs your audience.
Timeline maps are versatile tools that can be used in various contexts, from project management and historical education to personal development and goal tracking. With the right approach, you can create a timeline map that is both informative and visually appealing, making it easier for viewers to understand and retain the information presented.
Whether you’re a student, a project manager, or simply someone looking to visualize a sequence of events, mastering the art of creating timeline maps can be a valuable skill. So, start exploring different tools and techniques, and create your own timeline map to effectively communicate your story.
Discover tips for creating clear and engaging timeline maps to effectively organize and visualize project milestones, deadlines, and event schedules.
Education Consultant
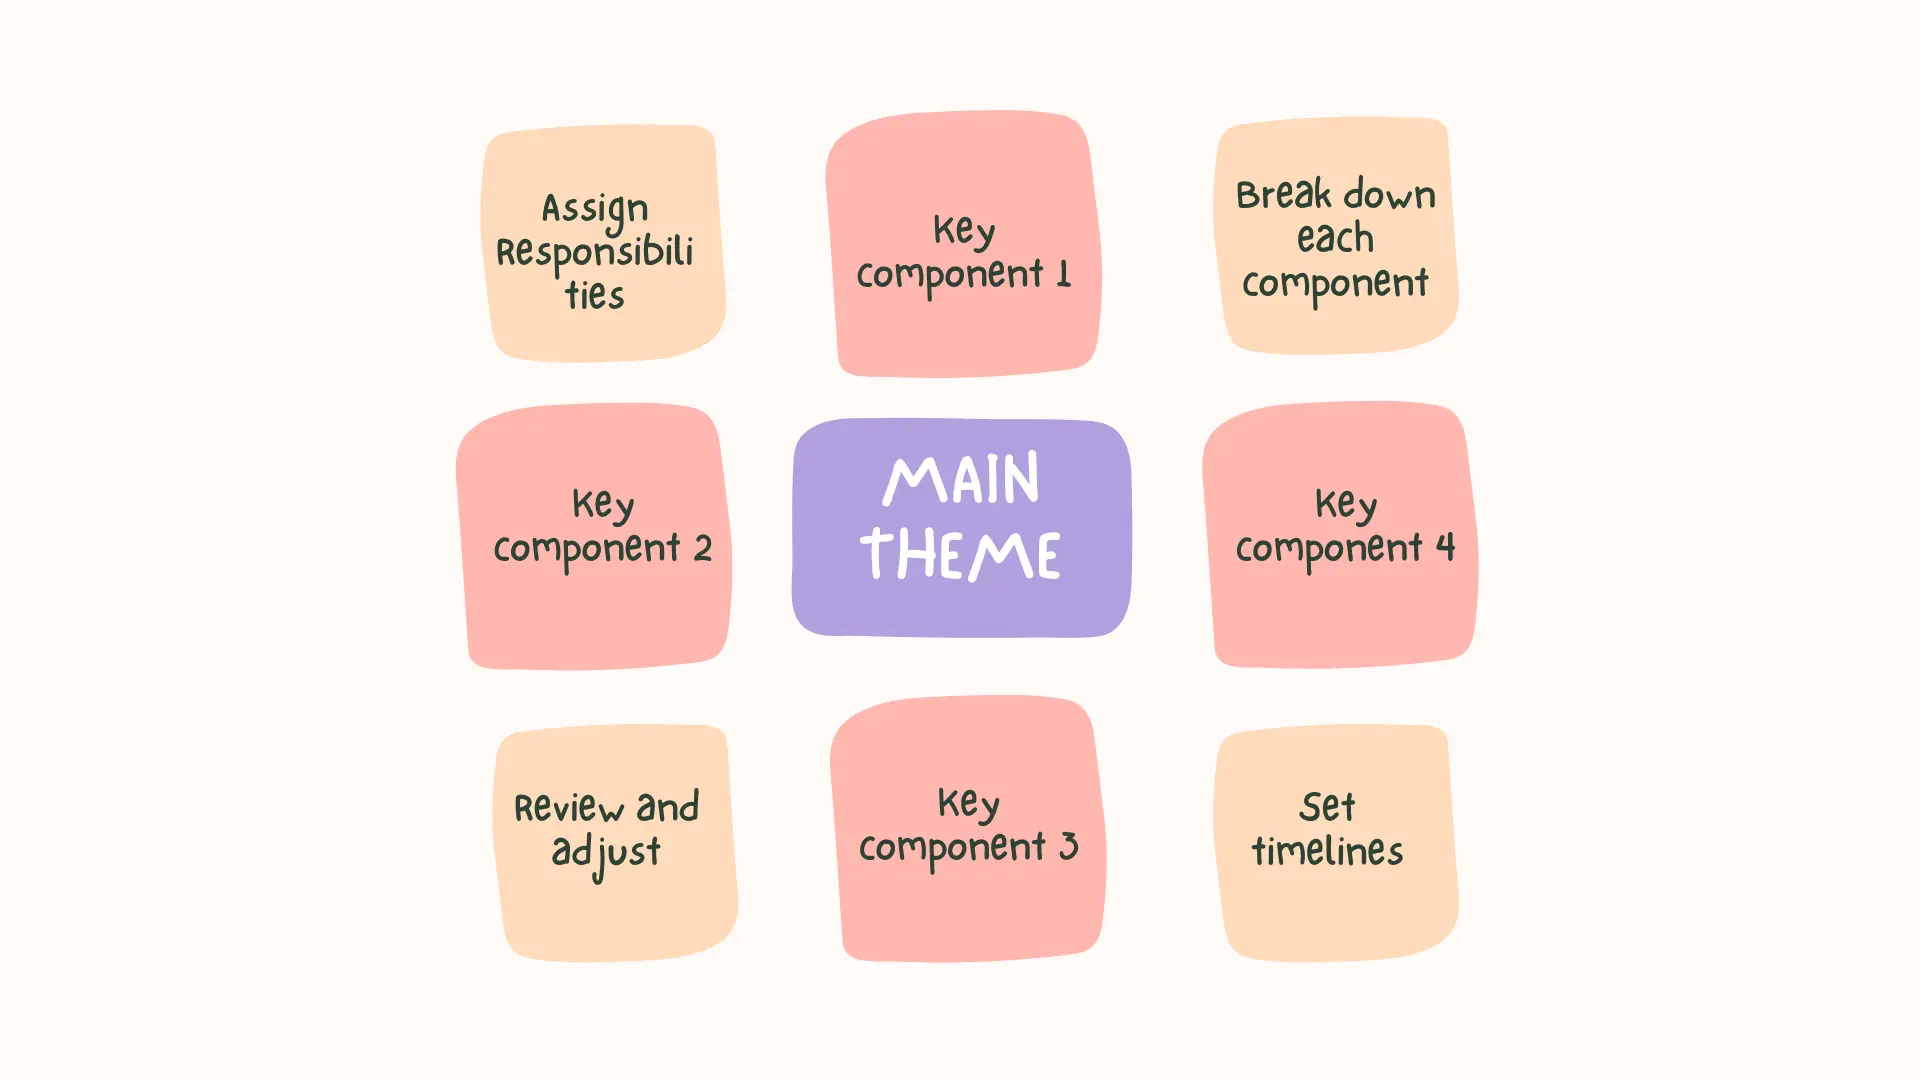
This blog offers useful tips on creating project plans using mind maps, covering essential steps like defining themes, assigning tasks, setting timelines, and collaborating efficiently.
Education Consultant
Explore effective timeline mind maps with our 2024 guide. Master best practices with popular tools and match the right map for your planning needs.
Education Consultant